WordPress is the leading and most popular blogging platform around. The increasing popularity of this platform encourages companies and entrepreneurs to set up a blog to publish and update their content to the audience. Blogging is a great way to drive traffic to your website. Many users come to your website through a blog, then get directed to the main page. This helps you increase visitor traffic. The lack of a blog can be fatal for any website.
Read moreOne of the best bits about WordPress is that it’s super easy to use. It’s basically the “easy mode” of web design. Installation of WordPress itself takes less than 5 minutes. The most commonly required changes to your websites appearance (and functionality) can be completed without ever needing to write a single line of code.
However, while WordPress is undoubtedly the easiest way to create a self-hosted website – there is still a little bit of a learning curve.
Switching your site’s theme is often the first large scale task many people undertake with their brand new WordPress website. We will be the first to admit it can be a little confusing if you’ve never done it before.
Today we are going to walk you through exactly what you need to do to switch WordPress themes (properly). And give you a few essential tips that may not be obvious to the new webmaster.
Let’s Get Started
Step 1 – Find Your New Theme
Before we even begin the switching process you’re going to need to find the theme you want to have on your site. One of the best bits about WordPress (and one of the main reasons it’s so popular) is that there is a huge selection of free and premium themes to choose from.
Free themes are more than acceptable for most requirements, but premium themes are well worth the money. They are generally faster, more secure, and have advanced features that free themes may not provide (they also usually look a lot better too).
You have a few options when it comes to themes, you can either use WordPress’s inbuilt search functionality, or you can download a theme from a third party and upload it manually.
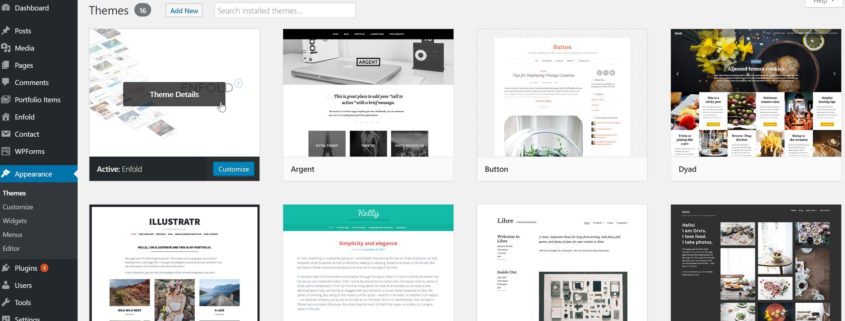
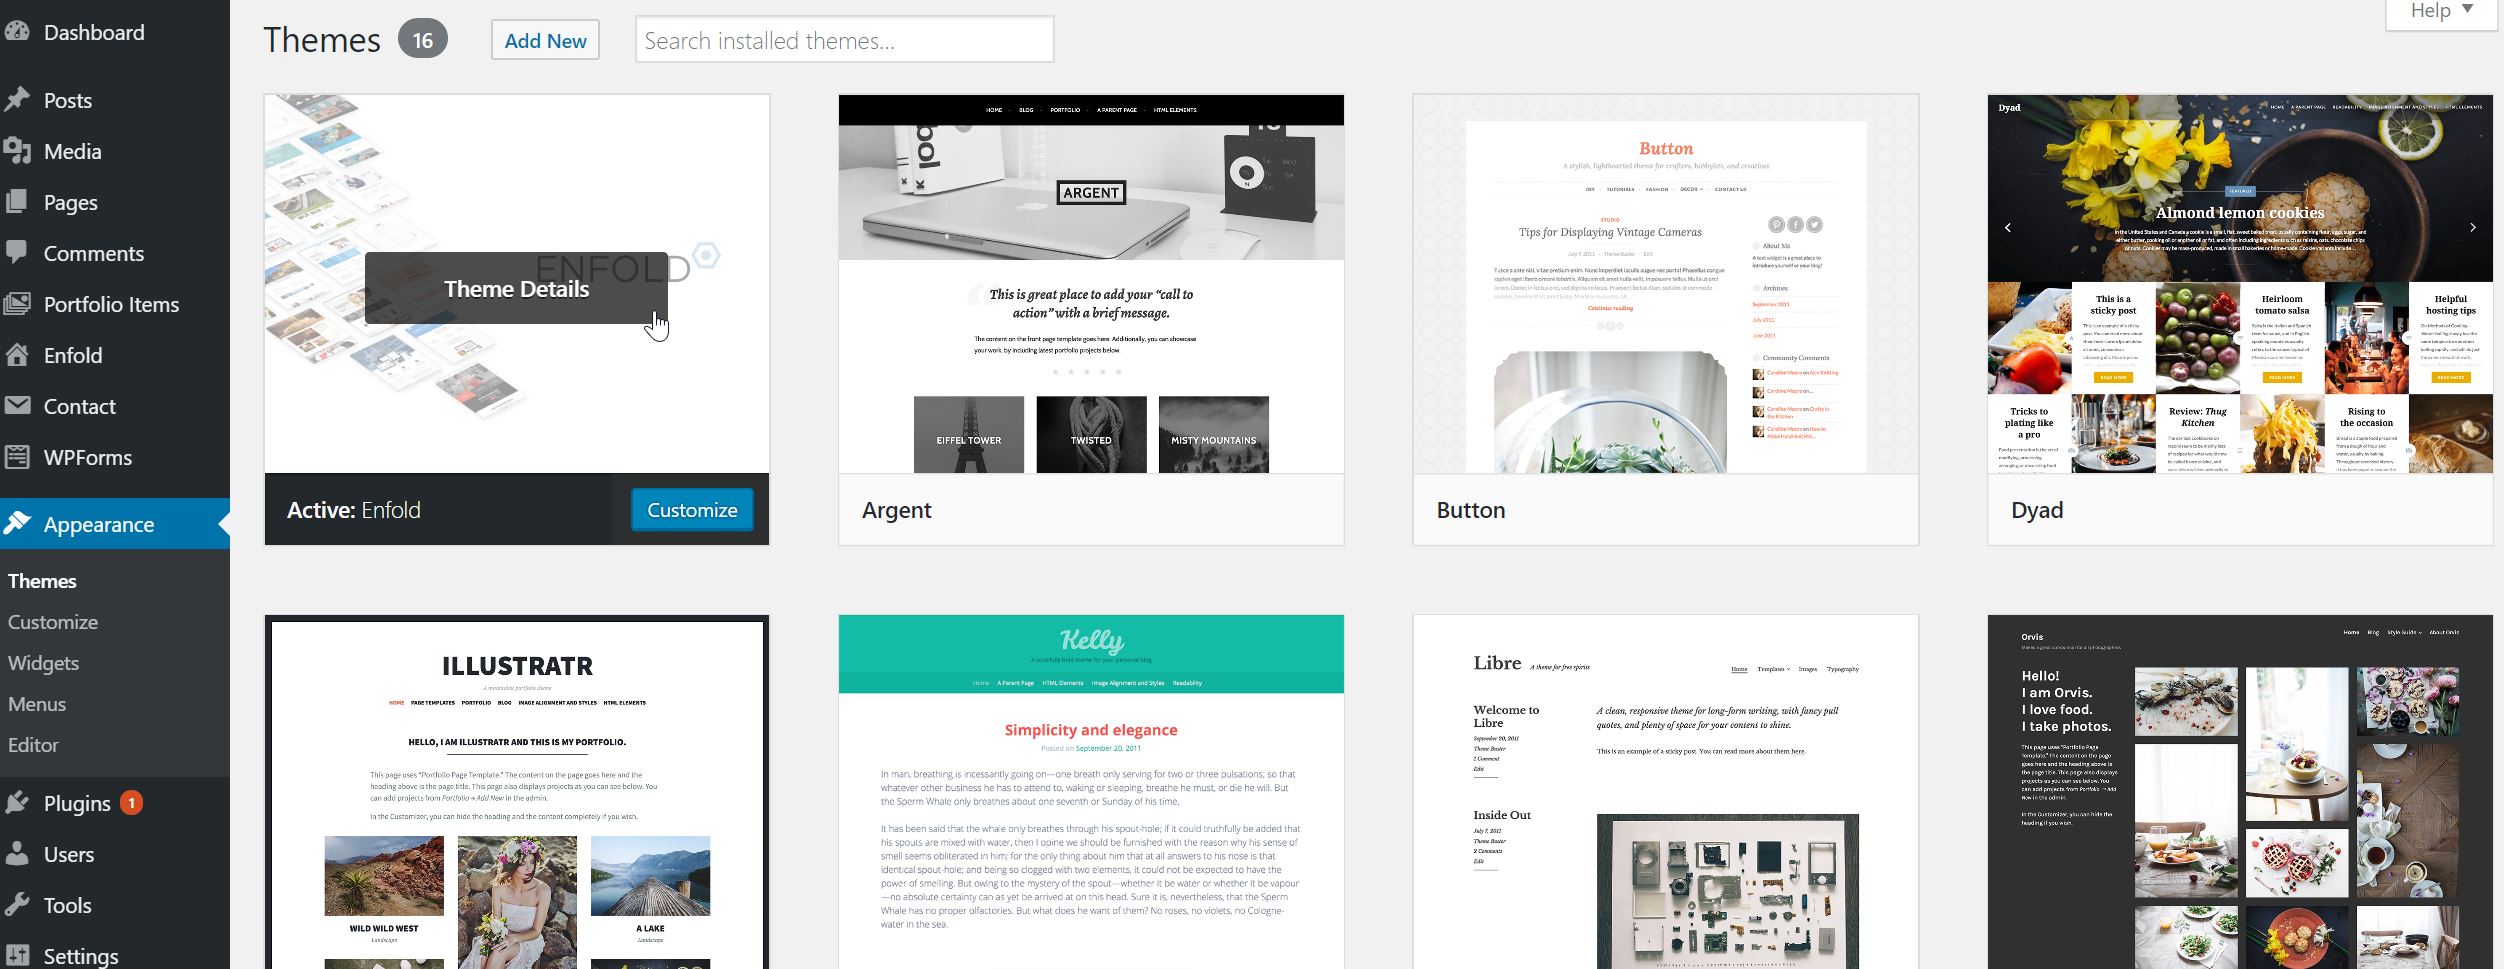
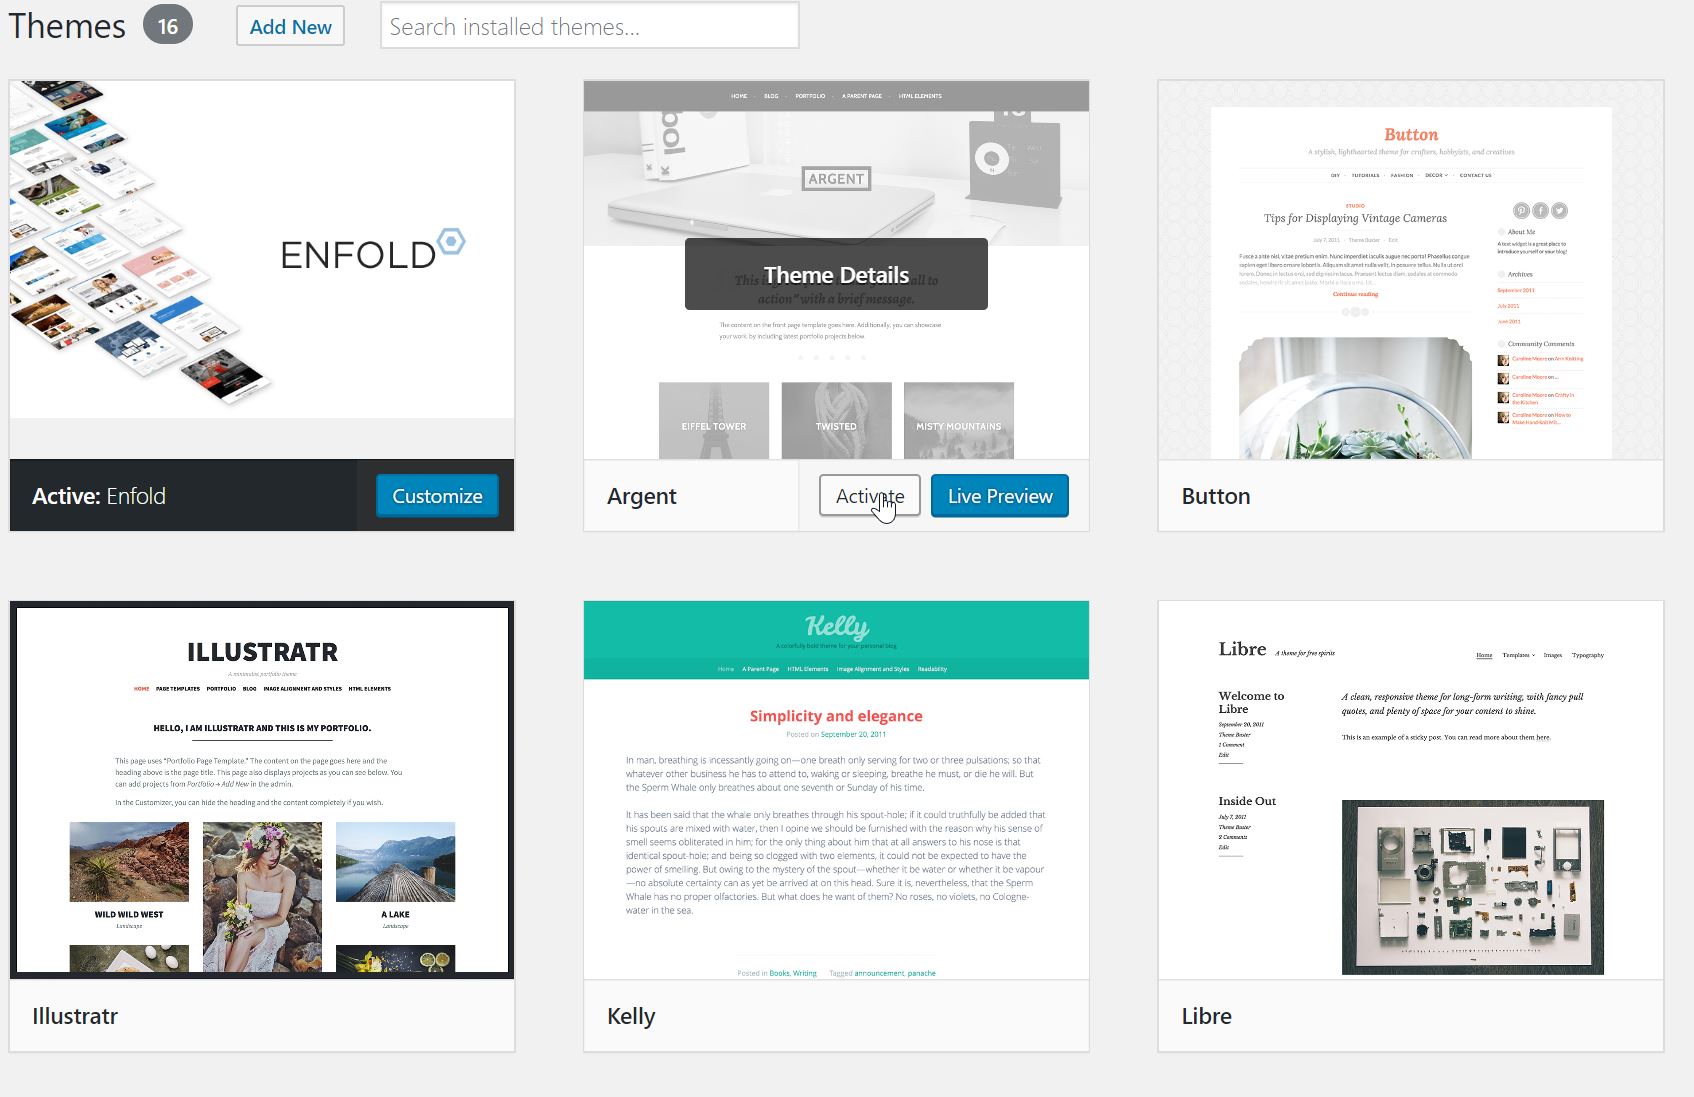
It’s super simple to search themes inside WordPress. On the main menu bar (the big black bar that runs from top to bottom on the left-hand side of the screen) click “Appearance”, and then click “Themes”. You should see something that looks like the screenshot below.
When you’re on that page click “Add New”.
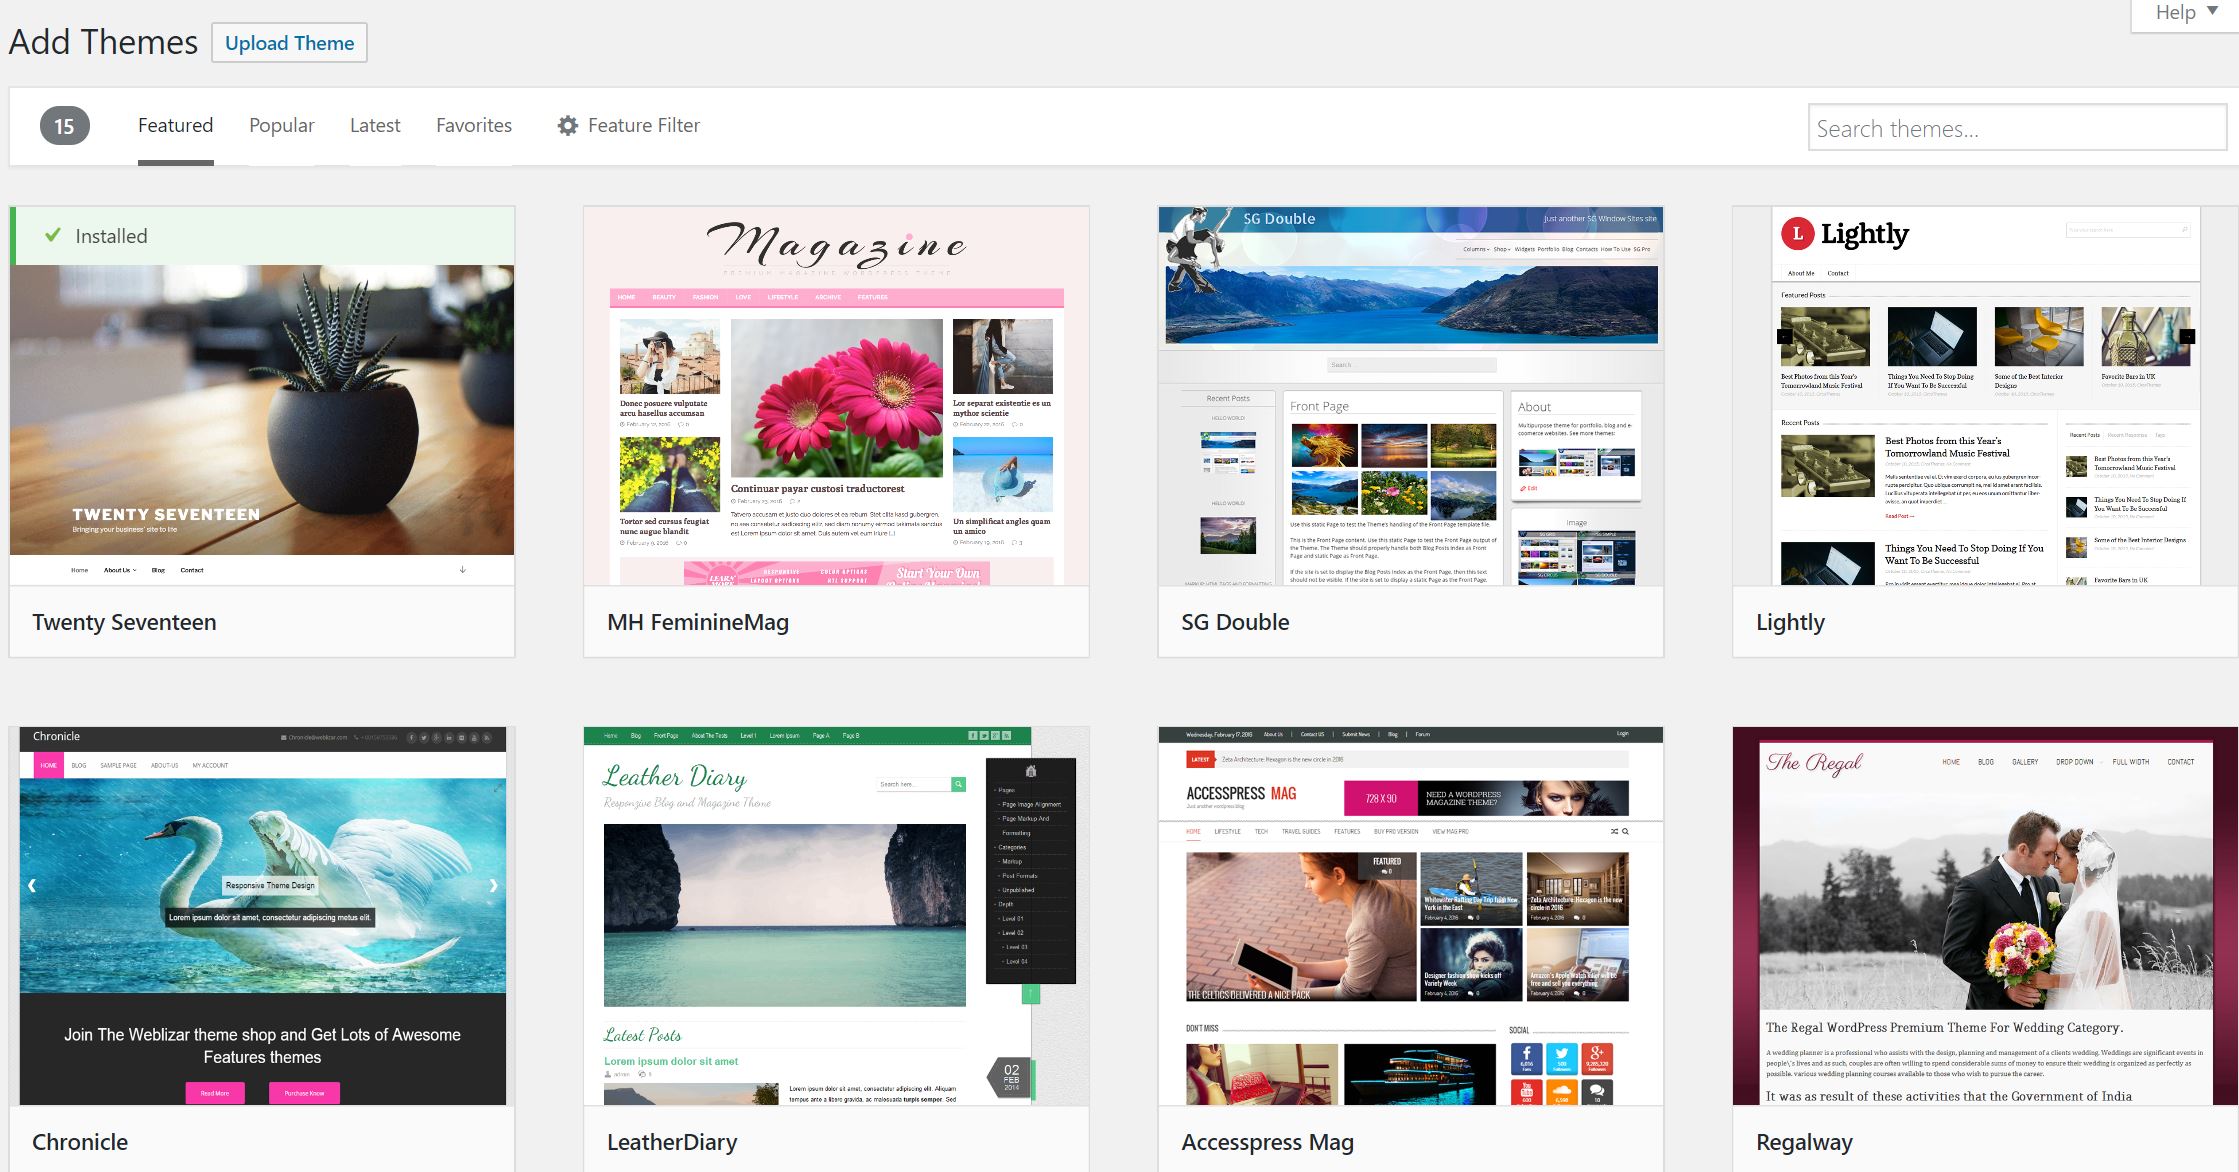
You should now see a selection of themes that you can install. All the themes in these search results are free. You’ll notice that there are a few self-explanatory filters and a search box at the top of the screen that you can use to narrow down your search.
Clicking the preview button will show you a rough idea of what the theme will look like on your site.
Quite honestly the preview feature needs a bit of work because it’s not very accurate. It shows what a generic site would look like with the theme installed. But it’s better than nothing. (If you want live examples Google the theme name and you should get a better idea of what’s what).
Step 2a – Install The Theme (From WordPress)
Once you have found the theme you want, the next step is to install it. It’s important to note here that installing a theme and activating a theme are two different things.
If you have downloaded a theme from an external website (instead of using the inbuilt search function we discussed above) then skip this section and jump to section 2b instead.
If you’re using the in built WordPress search function then installing the theme is literally as simple as clicking “Install” on the theme you want as shown in the screenshot below.
Wait a few seconds while it downloads. Once you see the message “Installed” you’re ready to move on to the final step.
Step 2b – Install The Theme (From An External Website)
WordPress’s search function has a great selection of theme options, but sometimes you’re going to want to use a premium theme (or a theme that is not listed in the search function). In this case, you’ll have downloaded a zip file from an external website that contains the theme’s source code. You’re going to need to upload that zip file to WordPress.
To do this you’re going to need to click Appearance in the main menu (the big black bar on the left-hand side of the screen) and then click “Themes”. When done should see something like the screenshot below.
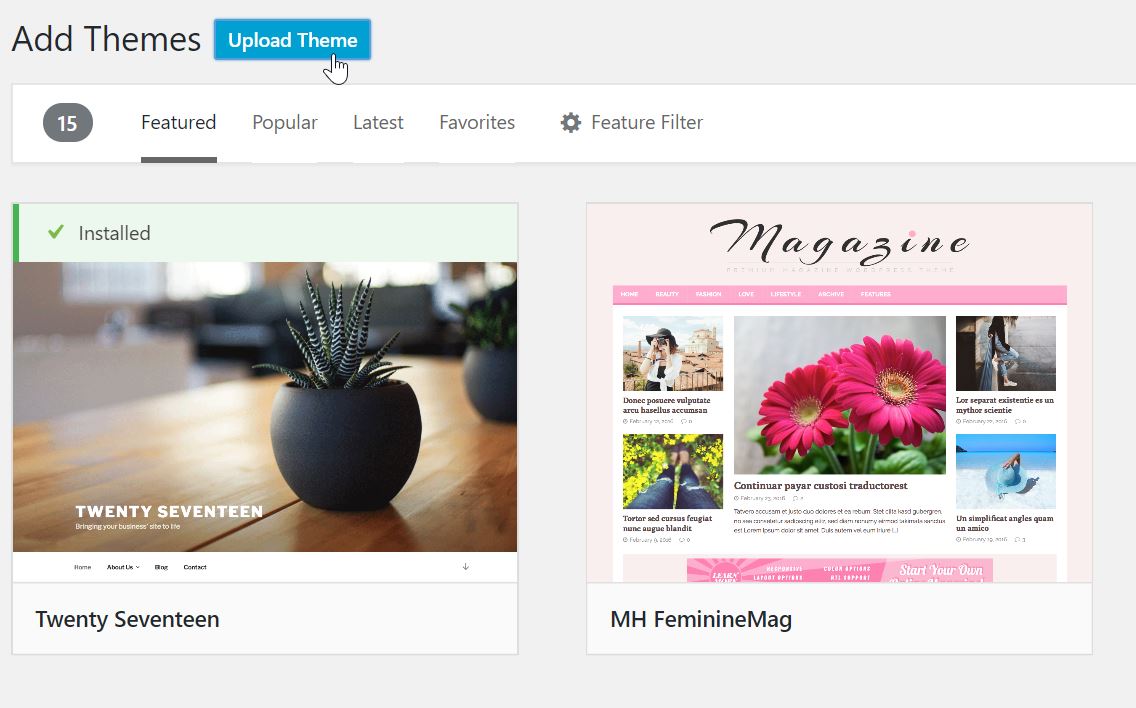
Then you need to click on “Add New” and you’ll see a blue button that says “Upload Theme” like in the picture below.
Click that button and select the zip file you downloaded earlier. Press “Install Now” and your theme will be installed.
Note: While the vast majority of WordPress themes are clean, there are a sizeable amount of hackers that will distribute WordPress themes that have malicious code in them. This can give them full access to your website (and often your server) and it’s a REALLY big problem to fix.
They can send out spam email, deface your website, add hidden links, steal user data, or conduct any other nefarious activity they wish. Be very careful with the external themes you install. Avoid pirated, cracked, and nulled themes as these almost always have malicious code in them.
Step 3 – Activation
Once you’ve installed your theme it’s time to activate it. A WordPress installation can have several themes installed at any one time, but it can only have one of those themes activated.
Unless you already see a button saying activate then you need to click on “Appearance” in the main menu and then click “Themes”. Click “Activate” on the theme you’ve just installed and hey presto, your new theme is live.
Congratulations! You’ve just switched a WordPress theme!
Step 4 – Customization (Optional)
Most themes these days allow you to have some level of customization within them. In general premium themes have much more customization capability than free ones.
Every theme is different in this respect, so we are not going to go into great detail about what to change and how to change it. But we can at least point you in the right direction to find where the customization settings are.
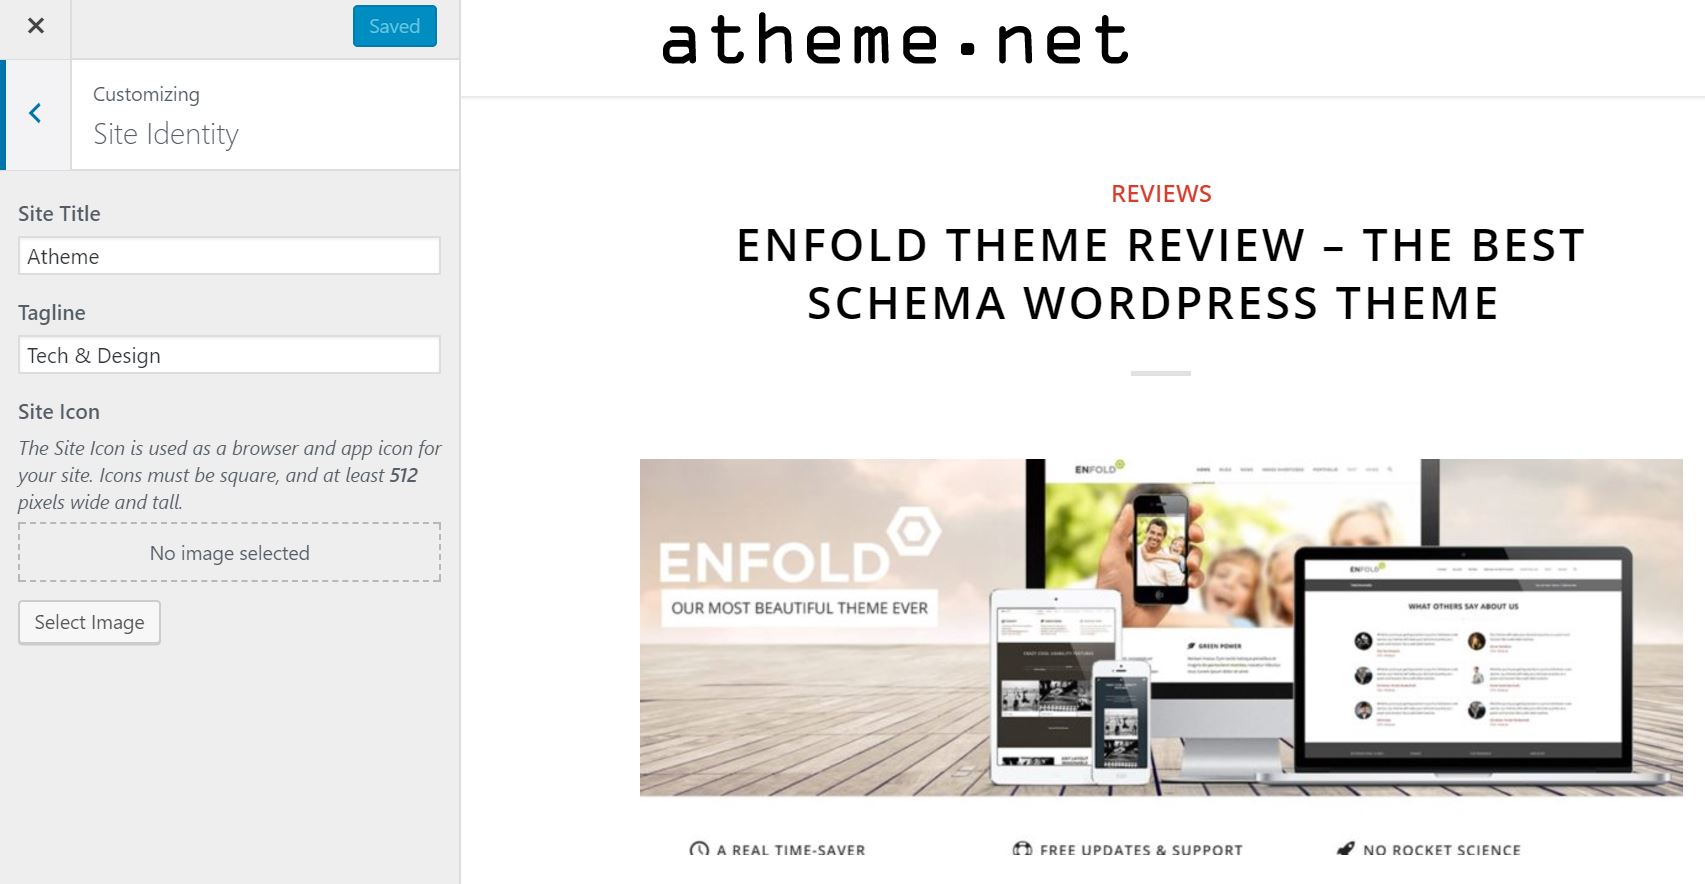
In the main left-hand menu click “Appearance” then click “Customize”. You’ll be greeted with a new menu on the left-hand side of the screen, and a live preview pane on the right-hand side like the screenshot below.
You can experiment with the settings in here as much as you like without having to worry too much (because you need to manually save the changes).
When you have made a customization you like, simply press the big blue “Save changes” button at the top and you’re done.
12 Tips To Make Your Theme Change As Painless As Possible
As you can see from the instructions above, there is not really that much you need to know to be able to change a WordPress theme. The developers who make WordPress consciously try to make as much of the functionality of the platform as user-friendly as possible.
However, while the actual process of changing the theme is simple, there are several things you should be doing before, during, and after the switch that may not be immediately obvious.
By following the tips below you’ll be able to prevent and protect against issues occurring during the theme change, and ensure your visitors get the best experience possible.
Before The Update
Listen To Your Users
Before you attempt any theme update you should be paying attention to what your users are saying about the usability of your site. Delve through the comment sections on your articles to see if anyone has made any remarks about features they like (or don’t like) and to learn about any issues they may have encountered.
It’s a treasure trove of information in some cases and the smallest little hint based off of one user comment can be more than enough to work with. If you go through the comments and don’t find anything (or even if you do) consider directly asking for user feedback through questionnaires to get similar workable information.
Check Your Page Speed
Before you update your theme you should perform a full site speed audit. You can either do this with Google’s official page speed tool or you can use a premium tool that does a lot of the manual work for you. Note down the results of your testing down for later use.
Once you have finished the theme change you should then go back and repeat the page speed tests to see how your new theme compares. If the new theme is slower then you have a problem. Follow the advice given by the page speed tool as soon as possible to avoid a rankings drop in the search engines (and to avoid annoying your users).
Check Your Custom Code
Every single WordPress developer in the world recommends that you use child themes to make any edits to a main theme. However, not everyone follows that advice. If you’ve encountered a problem in the past or required customization, the chances are that you’ve just edited the main theme.
If you’ve done this, you’re about to learn why child themes were recommended in the first place. You’re going to need to go through your code and find any little bits of code you have added yourself (in case you need them again in your new theme). This is a boring and tedious task, but it needs to be done.
Note: If you don’t already, you should really get into the habit of using child themes now you have a new clean theme.
Backup
If you only take one tip away from this guide, make it this one. Backing up your WordPress installation is the most important thing you can do before changing your theme. Knowing that you have an up to date, fully functioning backup that you can restore in case of emergency is going to make the entire theme change much less stressful.
Despite this, many developers (even experienced ones) often skip this step. It seems easy to revert back to the old theme, and changing a theme is usually a deceptively easy job. However, there are lots of things that can go wrong, and lots of data that can be lost (sidebar widgets for example).
We know it can take a little while to backup your site, and we know that 99% of the time the theme change is going to go according to plan and it’s “wasted time”. But things can (and do) go wrong from time to time. When the day inevitably comes that you need your backup, you’re going to be thanking your lucky stars that you got into this good habit now.
No excuses, always backup before you switch themes.
During The Update
Maintenance Mode
When you are ready to start the theme change it’s time for maintenance mode. This is a simple toggle switch setting that makes your site inaccessible to anyone that is not logged in with admin privileges.
Maintenance mode has the benefit of hiding all your half complete dirty work while you’re performing the update. There is a good chance things are going to be a little bit screwy during the theme switch (you may have bugs to find and fix).
Hiding this mess from your users prevents them from accessing your content, but it also prevents them from having a bad experience (which is more important).
You can customize your maintenance mode page if you wish. It doesn’t have to be anything fancy but it’s going to look better than the standard WordPress status message. If you don’t have a huge amount of traffic, customization is probably not worth the effort. However, for larger sites, it can make your users feel like everything is under control (as the custom error page is a little bland and robotic).
Check For Compatibility
One of the biggest “issues” with the WordPress platform is the amount of plugins that refuse to work with one another correctly. Some plugins can clash with other plugins causing either the “white screen of death” or just some unexpected random behavior.
Once your new theme is updated, your first task is to check all your plugins are playing with one another nicely. Check they are all working as expected without any error messages.
If you do get the “white screen of death” you’re going to have to go into your file manager in Cpanel and remove plugins one by one until you get the site live again.
(Pro Tip: Just rename the folders instead of deleting them, this deactivates the plugin but makes it easy to reactivate them by changing the folder name back when you have found the issue).
Check Your Browsers
Cross browser compatibility is something many premium theme sellers put a lot of time and effort into. If you paid for your theme from a respected developer, then this section should be pretty quick and easy. If you got a free theme, you may have your work cut out for you.
As you may (or may not know) different browsers display websites in different ways. Chrome and Firefox are generally pretty reliable and it’s rare for them to cause issues compared to the disgrace known as internet explorer (or Microsoft Edge).
If you do notice errors in Chrome or Firefox then you should fix them immediately. But if you notice issues in older versions of IE (that are not present in modern IE) then you have a tough decision to make. Is it worth your time to fix the issue?
We suggest you take a look at your previous site analytics to see how many visitors are using the old browser. If hardly anyone visits your site on these old browsers, it’s probably not worth your time fixing the issues. If it’s a sizable amount of traffic, then you need to either fix your theme or restore your backup and find a new theme.
After The Update
Tell People What’s Happened
Ideally, you want to get maintenance mode down as soon as possible. So when you have checked that there are no huge obvious site breaking issues, you can release your theme into the wild and turn maintenance mode off.
However, this does mean that you are probably going to still have some obscure bugs that you’ve not been able to find during the short time you have had maintenance mode activated.
If you have a social media following you should put out a tweet asking people what they think about the new update (and asking them to report any bugs). This gives you the benefit of getting immediate feedback as well as getting bug reports. You can then follow up and find out browser information and steps to recreate the bug to fix it.
Additionally, we recommend that you put up a site wide notice (with one of the many plugins) that tell users that the update has happened. Explain to them that you’re looking for bug reports.
Include a link to a bug report form to make it as easy as possible for them to report the issue. There are multiple plugins that allow users to submit bug reports which are custom designed for this purpose and we highly recommend you look into using them. They will provide you with a bunch browser information (and the URL in question) alongside the message from the user.
Check Your Tracking
Did your old theme have the functionality to include tracking code on your pages? Or did you hard code it in? Most modern themes have functionality to add code into your header or footer without directly modifying the files, make sure you use it (and verify tracking is working). You’re going to need the data for some of the tips below.
Check Your Bounce Rate
There’s a good chance that your new theme is going to have a different navigation system compared to your old theme. Hopefully, this will improve upon your previous theme and will increase the average amount of time spent on your site, and decrease bounce rate.
However, it doesn’t always work like this.
Keep a close eye on your bounce rate after the theme update to see how your users are reacting. If it drops, take a look into some of the differences between your old theme and your new one.
Things like breadcrumbs, sidebar menus, footer menus, and static headers can all affect how likely a user is to click through to another page. If your new theme is missing something your old theme had, consider custom coding it into your new theme (or use a plugin) to replace it.
Keep An Eye On Your SEO
One of the biggest issues when changing your theme is guessing how Google is going to react to it. While the content of your pages will stay the same, WordPress themes are full of little bits and pieces that dramatically affect SEO.
Check things like category pages, tags, and related posts to see if they are randomly inserting keywords into your articles (that may put you over the keyword stuffing threshold).
If you don’t check this and then suddenly get a rankings drop a few months down the line, you’ll be left scratching your head wondering what’s happened. Diagnosing the cause of the rankings drop can be a real pain, so do yourself a favor and check it’s good once your new theme is up and running.
Do Some Spring Cleaning
The chances are that your WordPress installation has a ton of plugins running. Plugins are what made WordPress into the beast that it is today, without them the platform would be much less ubiquitous than it is.
Plugins are great when they are updated and used, but out of date or unused plugins slow your site down and create a security risk.
Once you’ve updated your theme and checked that everything is working you should do a plugin audit and check you actually need everything that you currently have installed. Newer themes have much more functionality than older themes, and there is a good chance that some older plugins you once required are now redundant (due to the enhanced functionality of your new theme).
Conclusion
So there you have it, everything there is to know about changing a WordPress theme. As you can probably tell by now actually changing the theme is the easy (and quick) part of the process. You’re going to spend much more time backing up and tracking things to ensure nothing goes wrong then you’ll spend installing the theme.
But if you follow the tips and steps we have outlined in this article above, you’re going to have one of most stress-free, streamlined, and successful WordPress theme switches possible.
Good luck!

