One of the best features of WordPress is that it is incredibly user-friendly. It is essentially the “easy mode” of web publishing. Setting up WordPress takes less than five minutes, and the most common adjustments to your website’s appearance and layout can be made without writing a single line of code.
However, while WordPress is undoubtedly the easiest way to launch a self-hosted website, there is still a small learning curve.
Switching your site’s theme is often the first major custom project new webmasters undertake. It can be a little intimidating if you have never done it before. In this guide, we will walk you through exactly how to switch WordPress themes safely, along with crucial tips to prevent common mistakes.
Step 1: Find Your New Theme
Before you begin the switching process, you need to select your new theme. One of the main reasons WordPress is so popular is its massive library of free themes and premium themes.
While free themes are suitable for basic websites, premium themes are often well worth the investment. They are typically faster, more secure, offer dedicated updates, and look highly professional.
To search for themes directly inside WordPress, navigate to the main left-hand sidebar, click Appearance, and select Themes.
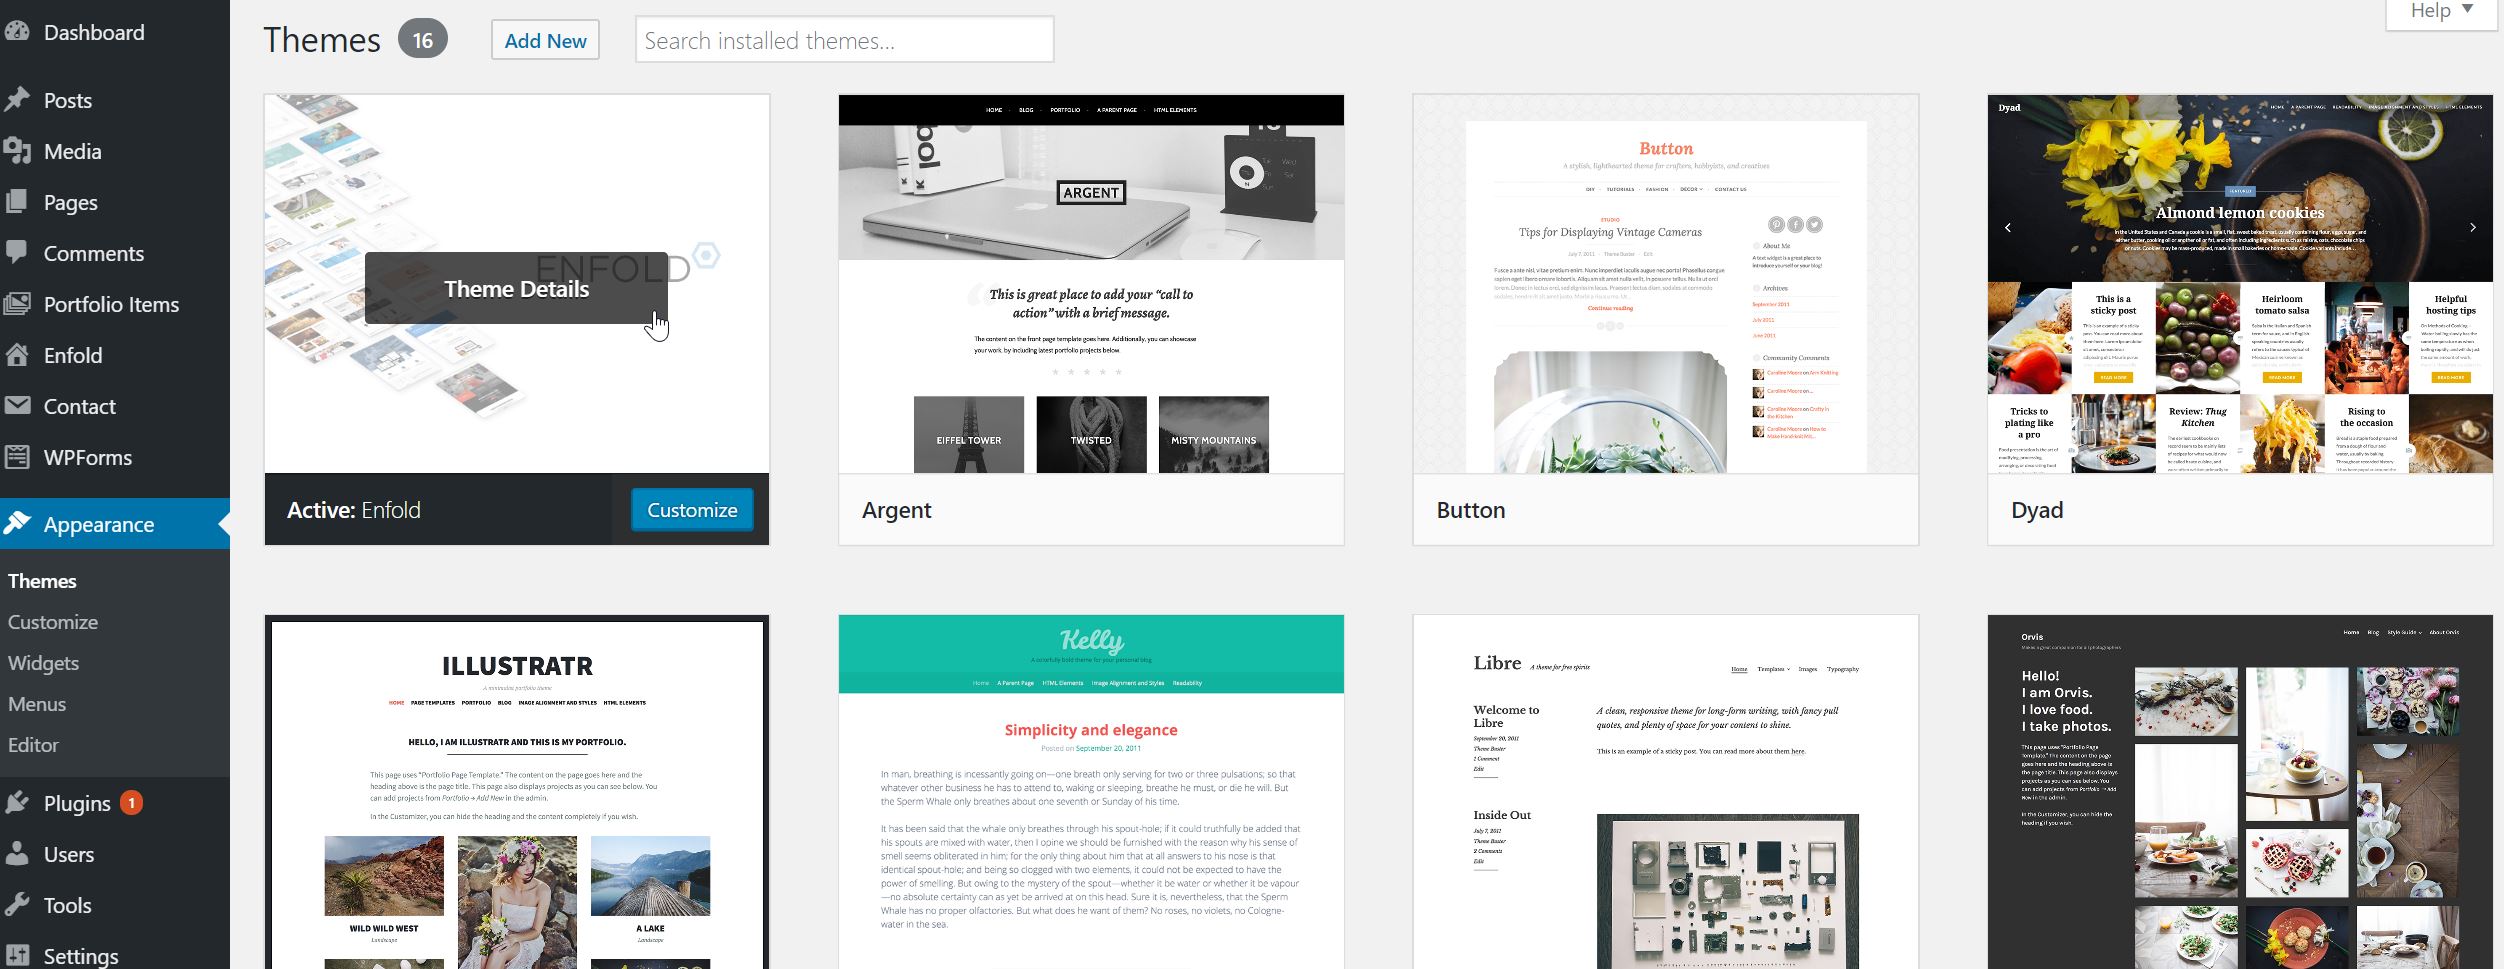
On this page, click the Add New button at the top.
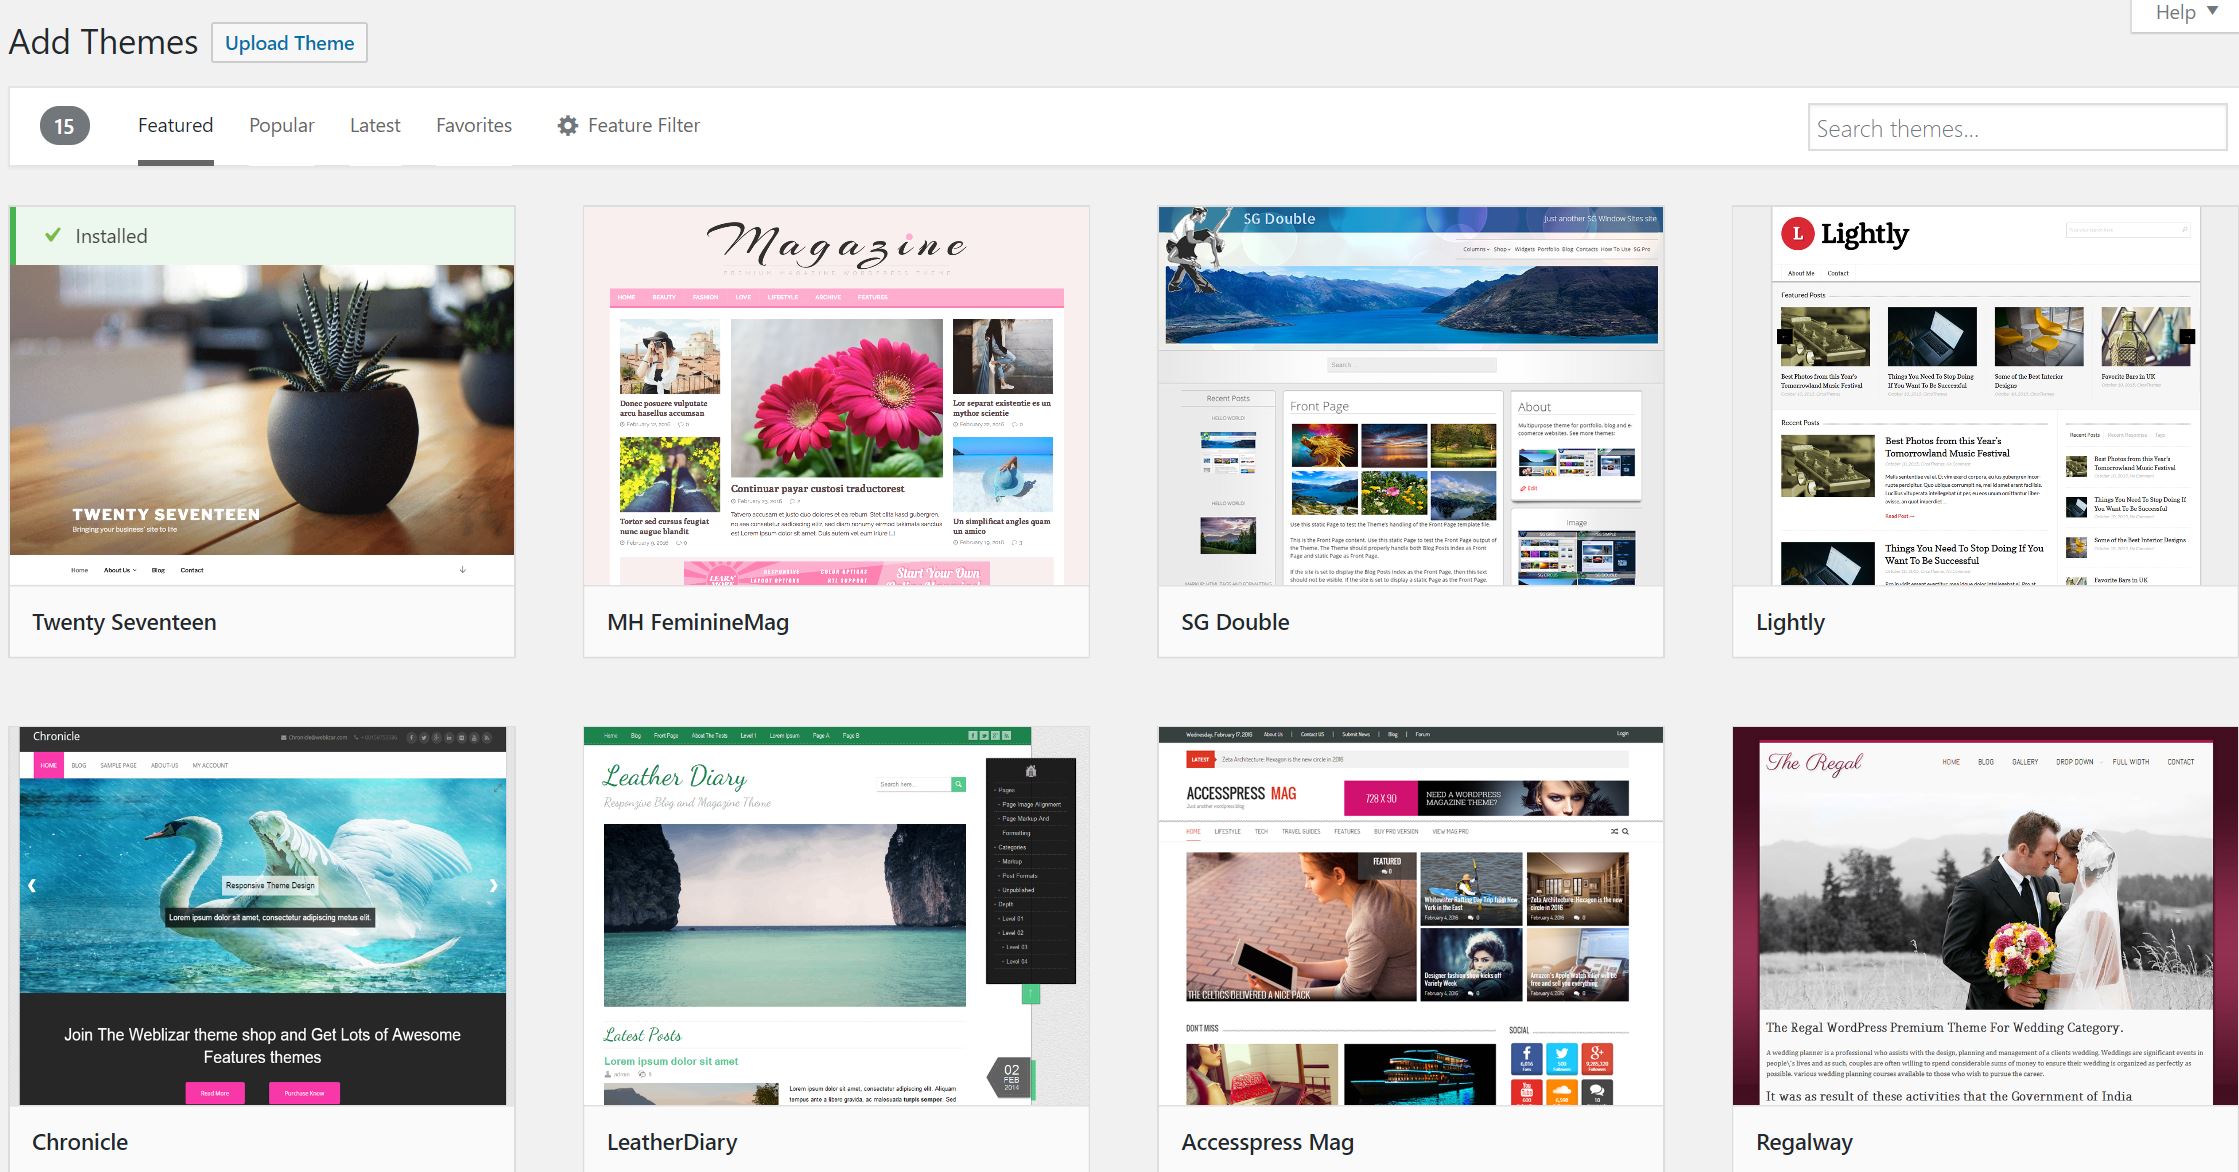
You will see a selection of free themes. You can use filters or the search box to find specific options. Clicking the Preview button gives you a basic representation of how the theme might look with generic content.
Tip: The built-in preview feature is often inaccurate because it doesn’t account for your actual content layout. We recommend visiting the theme creator’s official demo site for a live, functional preview.
Step 2a: Install the Theme (Directly from WordPress)
Once you have chosen a theme, it is time to install it. Note that installing a theme is not the same as activating it.
If you are using a free theme from the WordPress directory, simply hover over it and click Install.
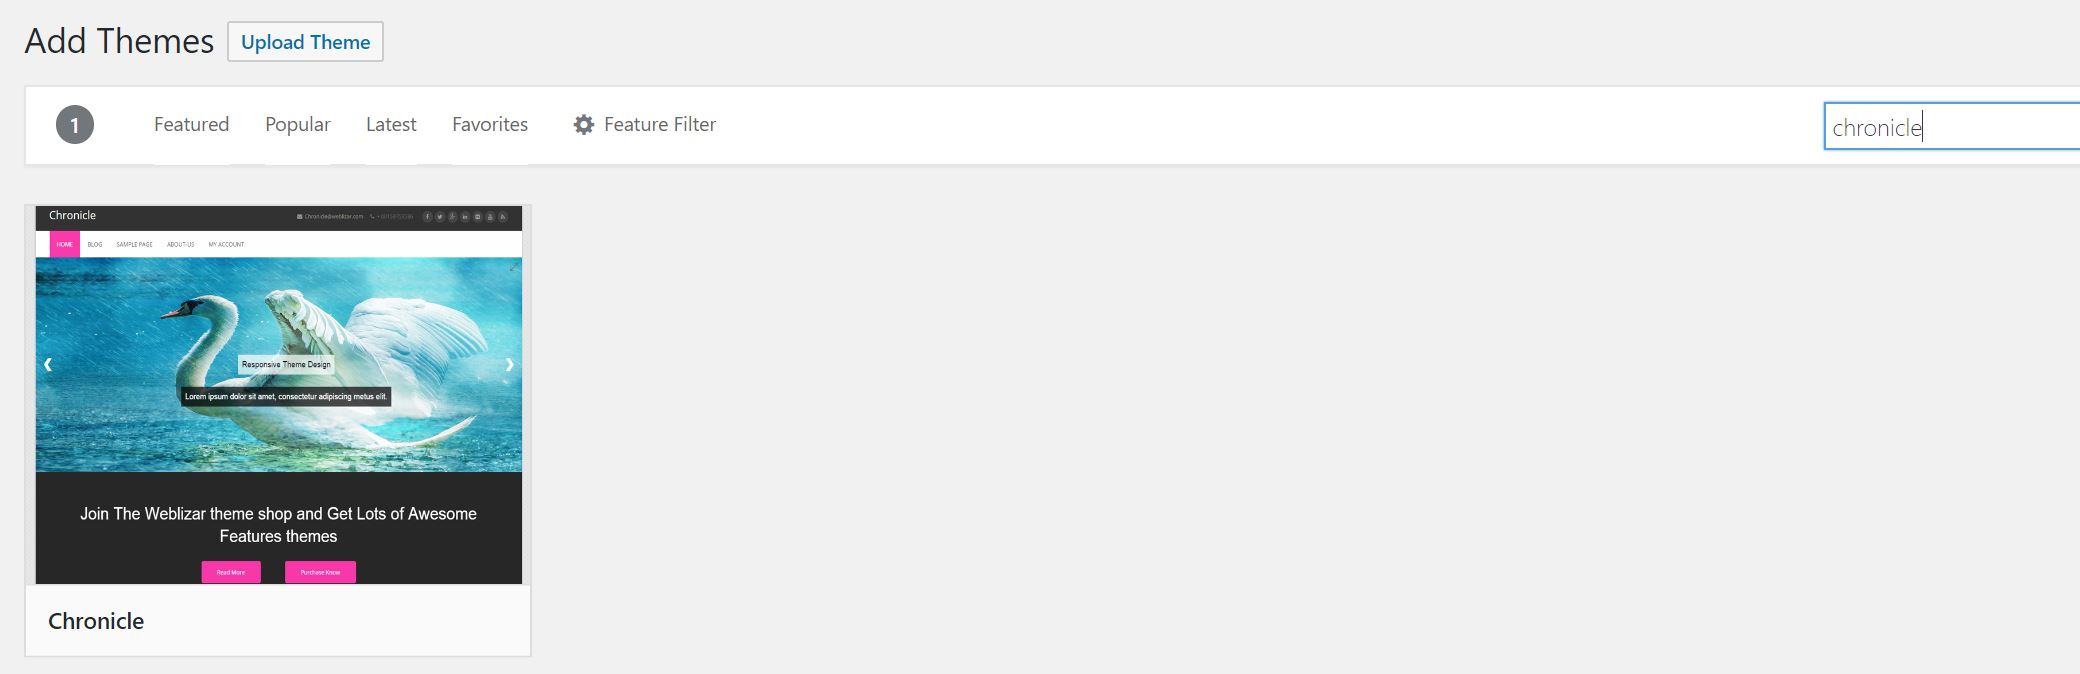
Wait a few seconds for the download to finish. Once the button changes to “Installed,” you are ready to activate it.
Step 2b: Install the Theme (From an External Zip File)
If you purchased a premium theme or downloaded one from a third-party directory, you will have a .zip file containing the theme’s source code. You will need to upload this manually.
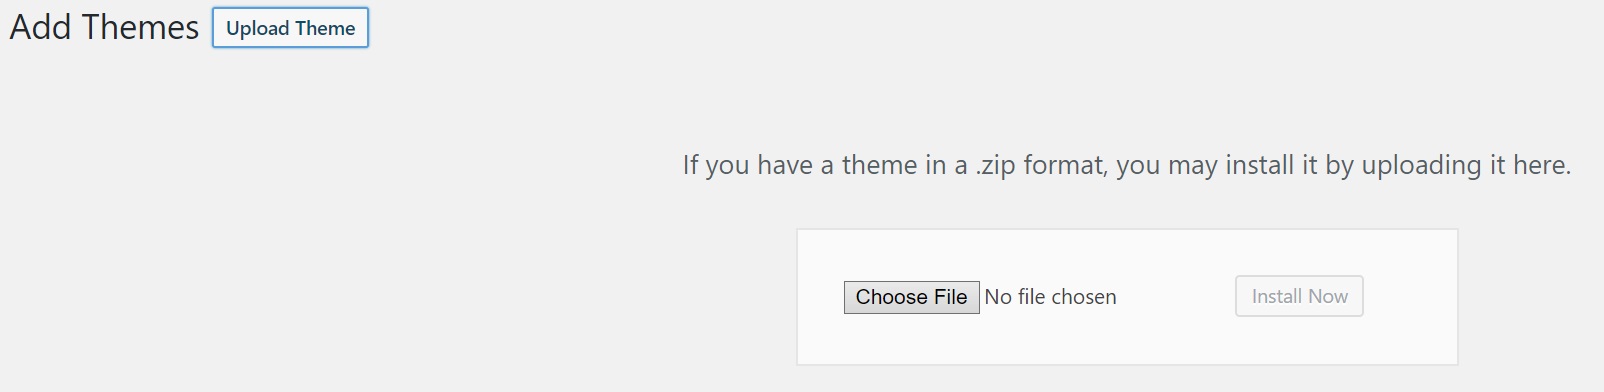
Navigate to Appearance > Themes, click Add New, and then click the Upload Theme button at the top.
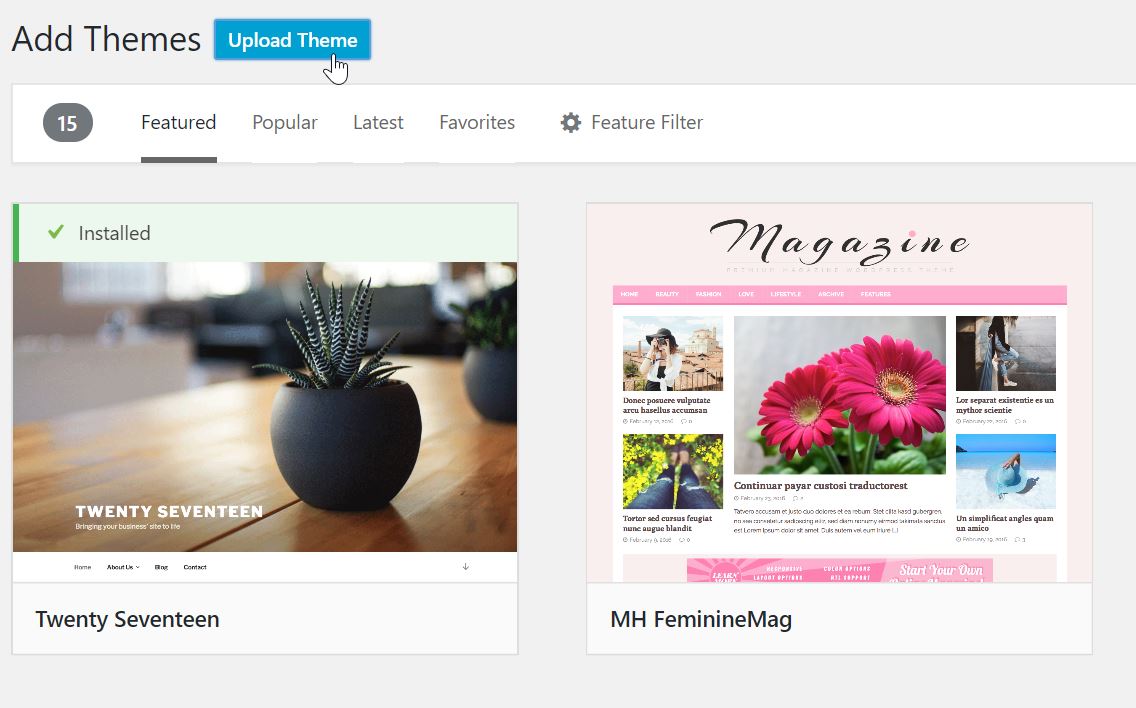
Click Choose File, select your theme’s .zip package, and click Install Now.
Warning: While the vast majority of WordPress themes are clean, some untrusted sites distribute cracked (“nulled”) premium themes that contain malicious code. This code can give attackers full access to your site or server, allowing them to send spam, steal customer details, or ruin your SEO ranking. Always purchase themes from official sources.
Step 3: Activation
A WordPress site can have multiple themes installed, but only one can be active at a time.
Go to Appearance > Themes, hover over your newly installed theme, and click Activate.
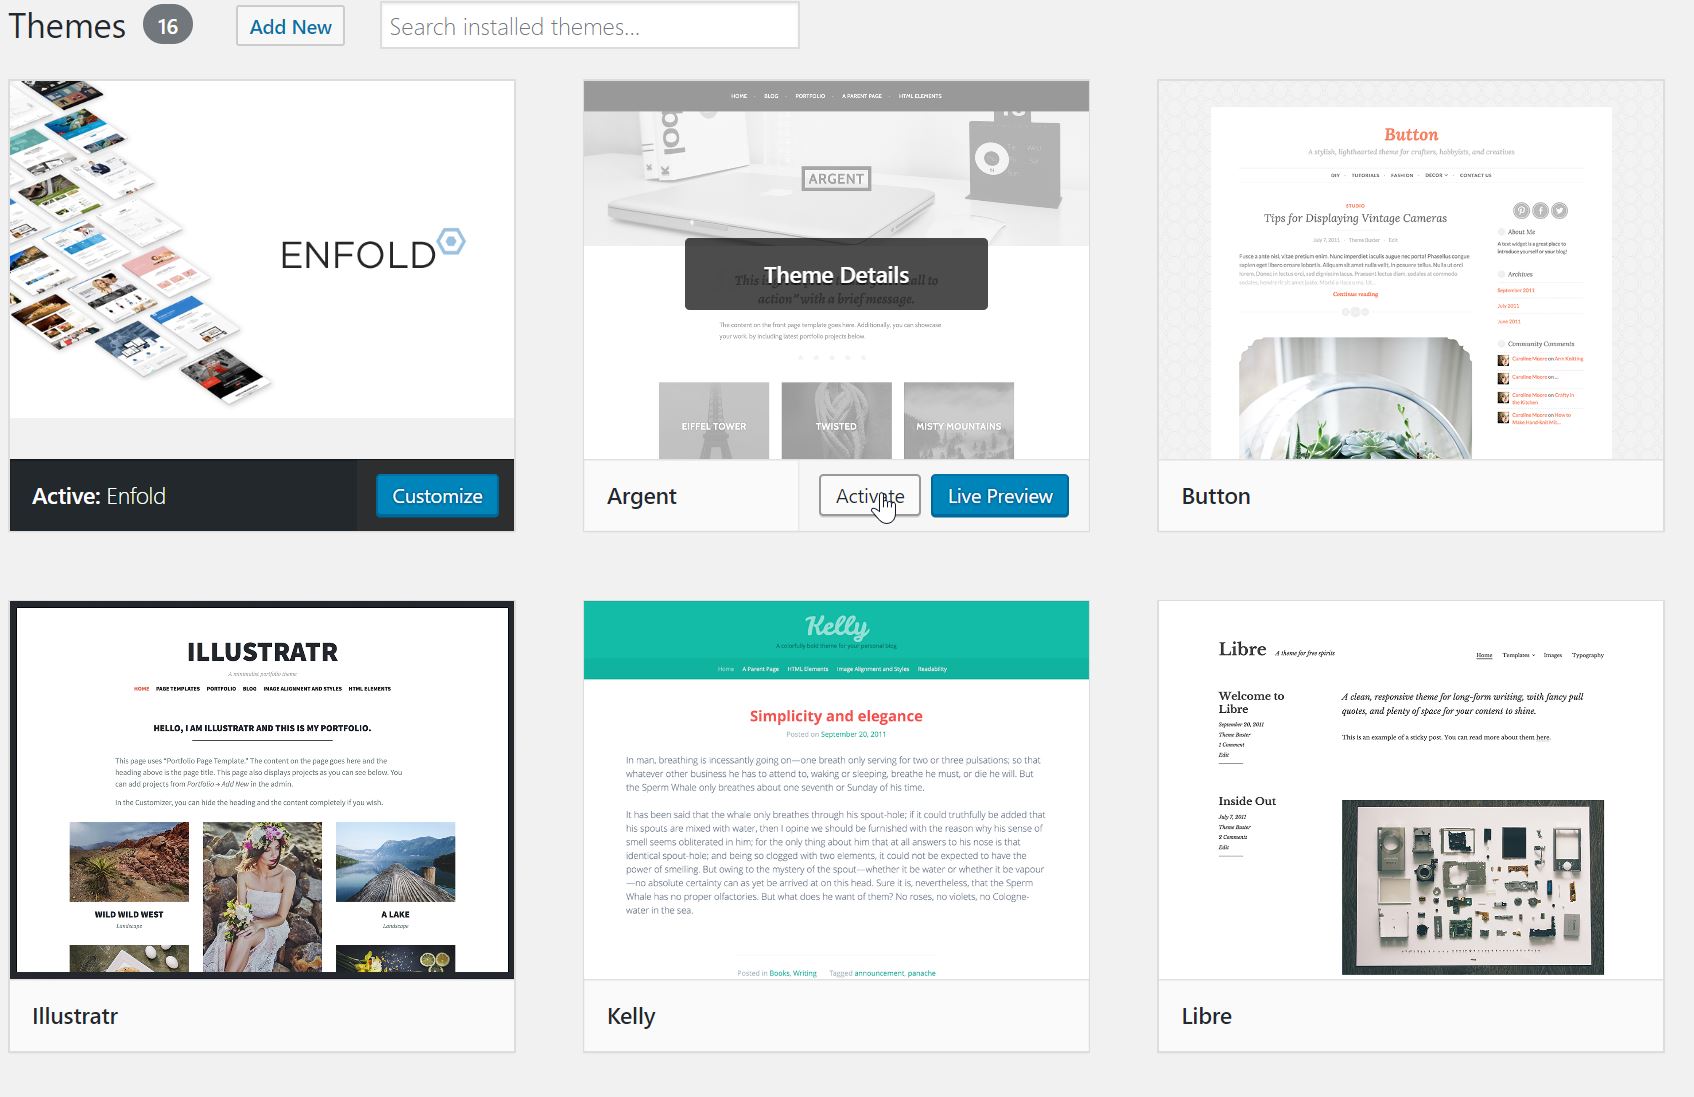
Your new theme is now live!
Step 4: Customization (Optional)
Most themes offer a dedicated customization panel. Navigate to Appearance > Customize to open the WordPress Customizer.
Here, you will see a settings menu on the left and a live preview of your website on the right.
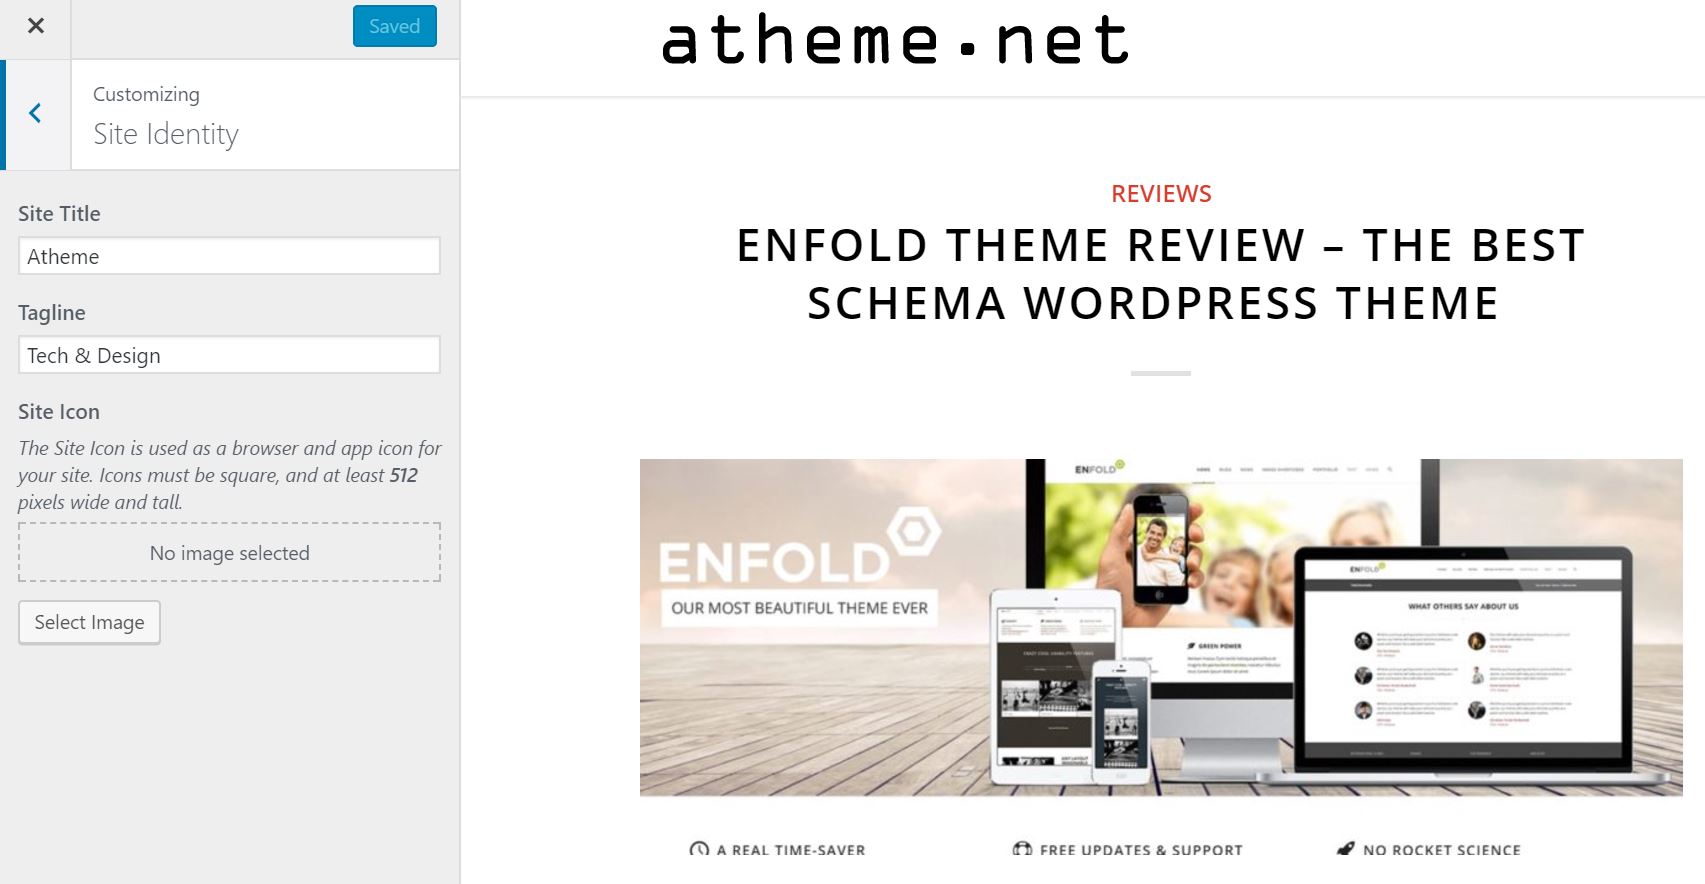
You can experiment with colors, widgets, and header layouts in real-time. These changes won’t affect your public site until you click the Publish (or Save) button at the top.
12 Tips to Ensure a Painless Theme Change
While the technical steps of switching a theme are simple, the transition can introduce layout discrepancies, broken widgets, or lost scripts if not handled carefully. Follow these essential tips to avoid downtime.
Before the Switch
1. Gather User Feedback
Before changing your design, review reader comments and feedback. You might discover that users love specific navigation structures or find certain font sizes hard to read. Use these insights to guide your new theme selection.
2. Audit Your Page Speed
Run a comprehensive speed audit on your current site using Google PageSpeed Insights. Save these results. Once the new theme is active, run the test again to verify that your new setup is indeed faster and hasn’t compromised performance.
3. Save Custom Code Snippets
If you previously added custom code (like Google Analytics scripts, CSS tweaks, or header modifications) directly to your old theme files (such as functions.php), make sure to copy and save them.
Note: Moving forward, always use a child theme or a code snippet plugin to add custom code so it survives theme updates.
4. Run a Complete Backup
This is the single most important step. Always perform a full database and file backup before activating a new theme. If something goes wrong (e.g., sidebar configurations are lost or a plugin conflict occurs), you can quickly roll your site back to a stable state.
During the Switch
5. Enable Maintenance Mode
When you are ready to switch, toggle on a maintenance mode plugin. This presents a clean “Under Construction” page to your visitors while you test layouts, adjust menus, and fix bugs in the background.
6. Check for Plugin Compatibility
WordPress themes and plugins can sometimes clash, resulting in layout bugs or the dreaded “White Screen of Death.” If your site crashes, log into your hosting file manager (or FTP), navigate to wp-content/plugins/, and temporarily rename your plugin folders to deactivate them one by one until you isolate the issue.
7. Perform Multi-Browser Testing
Test your new design across different browsers (Chrome, Firefox, Safari, and Edge) and mobile devices. A layout that looks pristine on your desktop Chrome browser might display broken elements on an iPhone or a tablet.
After the Switch
8. Request User Feedback
Once the theme is live, ask your community for feedback on social media. Encourage them to report any weird layout issues or broken links they encounter.
9. Verify Analytics Tracking
Ensure that your Google Analytics, search console tracking, and Facebook pixels are still firing. If these scripts were embedded in your old theme’s settings, you will need to re-add them to the new theme.
10. Monitor Your Bounce Rate
Watch your bounce rate in Google Analytics over the subsequent weeks. A sudden increase could mean that users are finding the new menu layout confusing or that critical sidebar resources are missing.
11. Keep an Eye on SEO Rankings
Themes control heading structures (H1-H6) and schema data. Make sure your new theme isn’t inserting duplicate tags or keyword stuffing your category layouts, which could trigger a rankings drop.
12. Run a Plugin Spring Clean
Take this opportunity to delete unused plugins. Since new themes often come with built-in features (like social sharing icons or breadcrumbs), you may be able to deactivate older plugins that are now redundant.
Conclusion
Switching your WordPress theme is straightforward, but taking the time to back up your database, audit your performance, and test across different browsers makes all the difference between a smooth launch and a critical site failure.